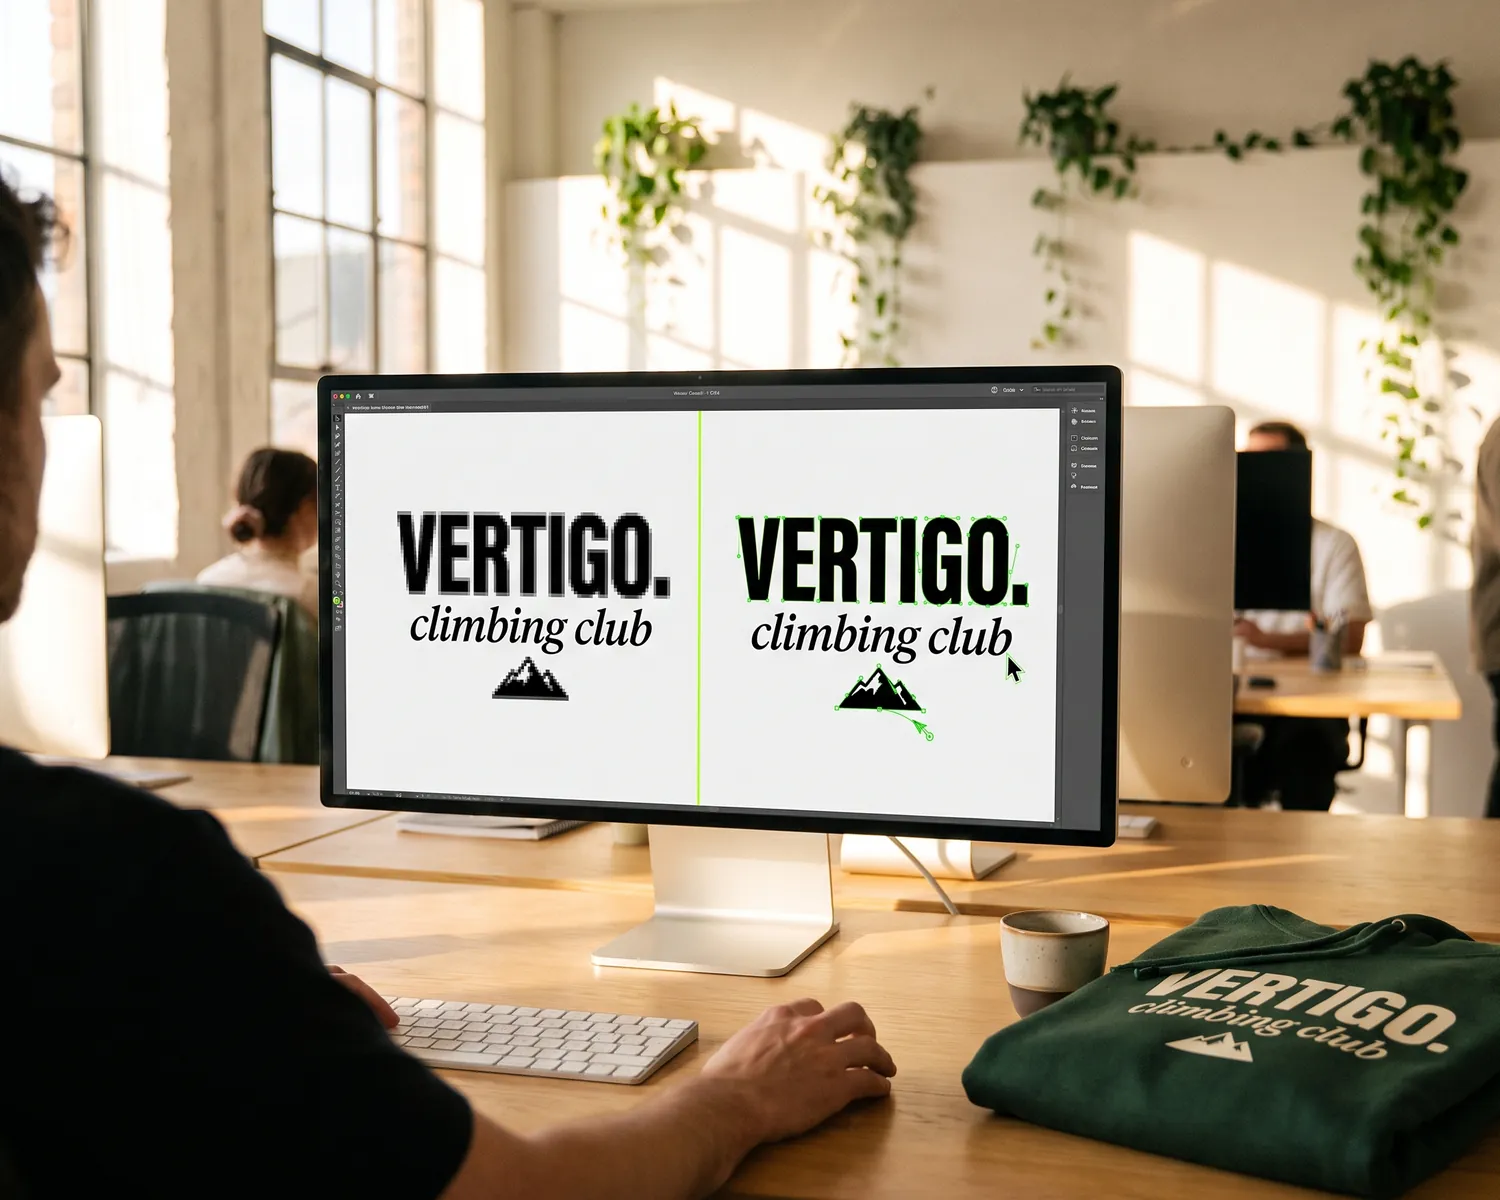
Vectorize an image or a logo: 5 methods, 3 of them free
To vectorize an image or a logo for free, three solutions are enough: an online tool such as Depixelise, the free software Inkscape, or, if the logo is going on a garment, the TKNP designer, which works directly from your PNG. Illustrator and graphic designers take over when the logo is complex.
The essentials in 4 points:
- Vectorizing means turning a grid of pixels into shapes described by their outlines: the logo stays sharp at any size.
- There are five methods: three free (online tool, Inkscape, TKNP designer for a garment) and two paid (Illustrator or a precision tool, graphic designer).
- Automatic vectorization works on a simple logo with flat colours; it fails on gradients, photos and small text.
- For a custom t-shirt or sweatshirt, a sharp high-definition PNG is often enough: you don't have to vectorize anything yourself.
"Please send us your logo as a vector file." The request often lands at the worst moment: the merch order is ready, the date is close, and the only file available is a PNG taken from the association's website or an email signature. Nobody on the team has Illustrator, and the designer who created the logo five years ago no longer replies.
The good news: in most cases, this is solved quickly, often without spending a cent. Here are the five methods, what each one costs, and how to know which one suits your logo.
What does vectorizing an image actually mean?
Vectorizing an image means redrawing a pixel-based image as mathematical paths. A JPG or a PNG is a grid of coloured dots: enlarged, it becomes blurry and jagged. A vector file describes each shape by its outline, so it can be spread across a whole sweatshirt back or shrunk to a chest logo without losing any sharpness.
The common vector formats are SVG, vector PDF, EPS and AI (Illustrator's native format). Beware the classic trap: a PNG placed inside a PDF is still a pixel image, even if the extension changes. To check whether your current file is already vector, the test in our file guide takes a single step.
The 5 methods to vectorize an image or a logo
| Method | Price | For whom | Its limit |
|---|---|---|---|
| Free online tool | €0 | a simple logo, right away | rough outlines on detailed logos |
| Inkscape | €0 (free software) | anyone willing to install software | a few settings to understand |
| Illustrator or precision tool | subscription | designers, demanding logos | paid |
| Graphic designer | from about $17 (ComeUp example) | blurry logo, fine text, gradient | turnaround time, and a brief to write |
| TKNP designer | €0 | a logo meant for a garment | only works for the catalogue's textile products |
The prices in this table were taken on 30 September 2026 from the tools' websites and a ComeUp listing.
1. A free online tool: the fastest
For a simple logo, an online tool gives you a vector file in seconds, with nothing to install.
- Depixelise, the free vectorization tool launched by our group: no sign-up, no paid version and no watermark, for logos in PNG, JPG, WebP or SVG up to 10 MB. You see the result in full size, then receive the SVG and a print pack by email.
- Stickerit: 10 free credits per month, i.e. 10 vectorized images, with a PDF export.
Vector Magic and Vectorizer.AI often give cleaner outlines on tricky logos. You can vectorize and preview as many images as you like, but downloading requires a subscription of €8.99 per month (Vector Magic also sells a desktop version at €274 per licence).
2. Inkscape: the free, open-source software
Inkscape is free vector drawing software (GNU GPL licence), available at no cost on Windows, macOS and Linux. Its vectorization feature does the same job as online tools, with more control.
The steps: import your image, select it, open the Path menu and then the Trace Bitmap command (shortcut Shift + Alt + B). Choose a single-colour trace for a one-colour logo, a multi-colour trace otherwise, run it, then delete the original image left underneath the trace. All that remains is to save as SVG or PDF.
3. Illustrator: the designers' benchmark
In Illustrator, vectorization starts from the Window menu, Image Trace panel: you choose a preset, adjust the number of colours and the precision, then click Expand to get paths you can edit one by one. It's the finest tool, but it runs on an Adobe subscription: best kept for those who already have it.
4. A graphic designer: when automatic isn't enough
A graphic designer redraws the logo by hand, curve by curve, and finds the right typeface instead of tracing the blur. On freelance platforms, a simple logo can be redrawn on a small budget: for example, a ComeUp listing offers this work for $17.43 (checked on 30 September 2026). Allow a few days' turnaround and have your brand's exact colours ready.
5. The TKNP designer: if the logo is going on a garment
If your logo is meant for a t-shirt, a sweatshirt or a cap, you can skip all the previous steps: the TKNP designer starts from your PNG. Details below.
When automatic vectorization fails
An automatic tool traces what it sees, flaws included. It almost always fails in four cases:
- Gradients and photos: they turn into stepped patches of colour, because the tool cuts the shades into flat areas.
- Small text: letters stick together or lose their serifs.
- Blurry edges: a heavily compressed JPG or a screenshot gives wobbly outlines, faithfully reproduced by the tool.
- Very colourful logos: the tool invents stray shapes between two close shades.
To judge the result, zoom in hard on the edges and the text. If the curves are smooth and the letters match the original, the file is good. If it wobbles or a letter has changed shape, move on to Illustrator or a graphic designer rather than fixing it point by point.
Incidentally, a logo designed in a single colour vectorizes far better than a ten-colour logo, and in screen printing each colour removed is one screen fewer: our guide to logo types explains why the one-colour version almost always wins on fabric.
Why your printer asks for a vector file
A textile printer asks for a vector file because two techniques really need one: screen printing and embroidery.
- In screen printing, each colour of the logo becomes a screen: the workshop has to separate clean flat areas, colour by colour, which a pixel file doesn't allow (the principle is detailed in our guide to t-shirt screen printing).
- In embroidery, the workshop converts the logo into a stitch programme: starting from clean shapes makes this step simpler and more faithful.
- In DTF and DTG, the file is printed as is: a high-definition PNG is enough, and they are the two techniques that render photos and gradients well.
To see exactly what our workshop expects, technique by technique (minimum text size, line thickness, resolution), everything is in the guide to preparing your logo.
For a garment, you often have nothing to vectorize
The fifth method is the simplest, but it only applies to a logo meant for a garment: don't vectorize anything yourself. Drop your PNG into the designer, from the customisation button on any product page in the TKNP catalogue, and the file preparation happens on our side.
What matters is the quality of the starting PNG. The designer accepts PNG, SVG, JPEG and WebP files up to 10 MB, measures their resolution on import and warns you if it isn't enough. A sharp high-definition PNG is enough: only a logo that has to be completely redrawn, such as a screenshot or a file that's too small, is quoted separately, before work starts. The designer is free to use, you only pay when you order, and it recommends the marking technique best suited to that logo and to the quantity ordered.
The full process, from uploading the logo to ordering, is laid out step by step in this guide, and the question of the right starting file in our formats guide. The right reflex before looking for software: open the catalogue, place your PNG on a t-shirt, and look at the result.
Key takeaways
- For a simple logo, a free online tool such as Depixelise or the Inkscape software is enough; Illustrator and a graphic designer are for complex logos.
- Automatic vectorization fails on gradients, photos, small text and blurry edges: zoom in on the result before sending it.
- For a TKNP custom garment, a sharp high-definition PNG is enough: the designer handles the rest.
Frequently asked questions
How do you vectorize an image for free?
With an online tool such as Depixelise (no sign-up, no paid version, SVG and print pack sent by email), or with the free software Inkscape, available at no cost on Windows, macOS and Linux. These solutions work well for simple logos with flat colours.
Can you vectorize a photo?
Technically yes, but the result looks like a flat-colour poster: the shades become blocks of colour. To put a photo on a garment, it's better to keep the image in high definition and choose DTF or DTG printing, which reproduce gradients.
How much does it cost to vectorize a logo?
From €0 with a free tool or Inkscape to €8.99 per month for precision tools such as Vector Magic or Vectorizer.AI (prices checked on 30 September 2026). A redraw by a freelance graphic designer can be found from about $17 for a simple logo (an example seen on ComeUp), more for a detailed one.
What is a vector image?
A vector image is an image described by shapes (lines, curves, flat areas) rather than pixels, which lets it be enlarged or reduced without losing sharpness. You can recognise it by its formats: SVG, vector PDF, EPS or AI. It's the ideal format for a logo, whether it's printed on a business card or across a whole sweatshirt back.
Your project, quoted within 24 hours.
Describe your garments, your decoration and your quantities: you receive a detailed quote, decoration included, within one business day.